Throughout this guide, we will break down the Iptables tutorial into three steps. First, we will talk about how to install the firewall in Ubuntu. The second step will discuss how to define the firewall rules and eventually we will make the iptables changes persistent in the instance.
Step One: Installing Iptables
Iptables is installed by default on most Linux distributions. But if you don’t already have it on your Ubuntu/Debian system by default, then follow these steps:
After connecting to your instance, run the following commands one by one:
sudo apt-get update
sudo apt-get install iptables
To check the status of your current iptables configuration, use the following command:
sudo iptables -L -v
In this command, the L- flag is used to list all the rules, and the v- flag to display the information in a more detailed format. You can see an example of the output below:
Chain INPUT (policy ACCEPT 0 packets, 0 bytes)
 pkts bytes target     prot opt in  out  source  destination

Chain FORWARD (policy ACCEPT 0 packets, 0 bytes)
 pkts bytes target     prot opt in  out  source  destination

Chain OUTPUT (policy ACCEPT 0 packets, 0 bytes)
 pkts bytes target     prot opt in  out  source  destination
You have now successfully installed the iptables firewall. At this point, all of the chains are set to ACCEPT and they have no rules. This is not safe because any packet can arrive without being filtered.
Step Two: Defining Chain Rules
To define a rule is to add it to the end of the chain. For this purpose, you must enter the -A (append) flag right after the iptables command, for example:
sudo iptables -A
You can then combine the command with other options, such as:
- i (interface) – The network interface in which traffic should be filtered, for example, eth0, lo, ppp0, etc.
- p (protocol) – The network protocol where the filtering operation is being done. This can be tcp, udp, udplite, icmp, sctp, icmpv6, and so on. You can also type all to select any protocol.
- s (source) – The address from which the traffic is originating. You may enter a hostname or an IP address.
- dport (destination port) – The destination port number of a protocol, for example, 22 (SSH), 443 (https), etc.
- J (target) – The target name (ACCEPT, DROP, RETURN). You must enter this whenever you create a new rule.
When you want to use all of them, you need to type the command in the following order:
sudo iptables -A <chain> -i <interface> -sudo iptables -A <chain> -i <interface> -p <protocol (tcp/udp) > -s <source> --dport <port no.> -j <target>
Having now learned the basics of Iptables commands, we can now configure the firewall for greater instance security.
Step Three: Making the Changes Persistent
The Iptables rules that we create are stored in memory. As a result, we will have to define them again after a reboot. To make these changes permanent following a restart of the instance, you could use the following command:
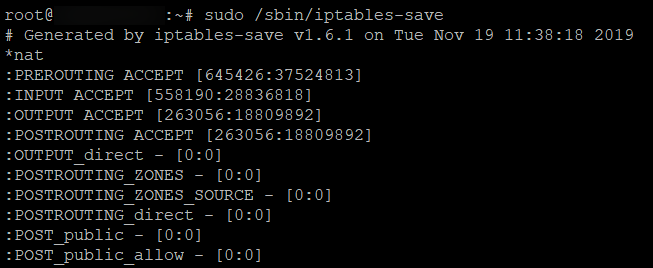
sudo /sbin/iptables-save
With this command, the current rules will be stored in the system configuration file, and this file will be used to reconfigure the tables every time the server is rebooted.
Keep in mind that you must run this command every time you change the rules. If you want to disable iptables, for example, you have to run these two lines:
sudo iptables -F
sudo /sbin/iptables-save
You will get the following output:

Iptables provides a powerful firewall for you to protect your Linux servers. We talked about how to install and use this tool during this tutorial. If you want to learn more about the rules and examples of this firewall, feel free to refer to the article “Iptables Common Rules and Commands.”